

Scrap Yarn as Stitch Marker ::
Posted by vicki brown on
Inspired by Ruth of Rock and Purl's recent blog posts on teaching I'd thought I'd share a little bit of a simple, yet hopefully useful, tutorial here today.
A lot of my crochet patterns, including my newest sock pattern, are worked in the round, but even those that aren't often require you to pop a marker in at some point during the piece. I always try and write the pattern as though you were using a removable stitch marker, because I know that's what a lot of people do, but you know something, I very very rarely do. I much prefer a little bit of scrap yarn! I think it works so much better, because a lot of the time, it's the space between the stitches I really need to mark, not the stitch itself and because for me, I learned a lot of my fibre techniques from knitting and that's the way you generally place a marker in knitting. I also think it's a much more accurate way of keeping place and doesn't require reattaching every round, so I thought I'd share with you how I do it.
First choose your scrap of yarn carefully, this may sound a little silly, but you don't want something that will leave strands of fibre in your work and you certainly don't really want to use wool, which may felt into your work. To be safe use some cotton or acrylic yarn, in a nice contrasting colour to your work, so that it's visible, but not something that may leak dye on your work, especially if you're working in lighter colours. I tend to use acrylic and I carry a little selection of ends around with me in my notions bag. You only really need about 2-3 inches of yarn.

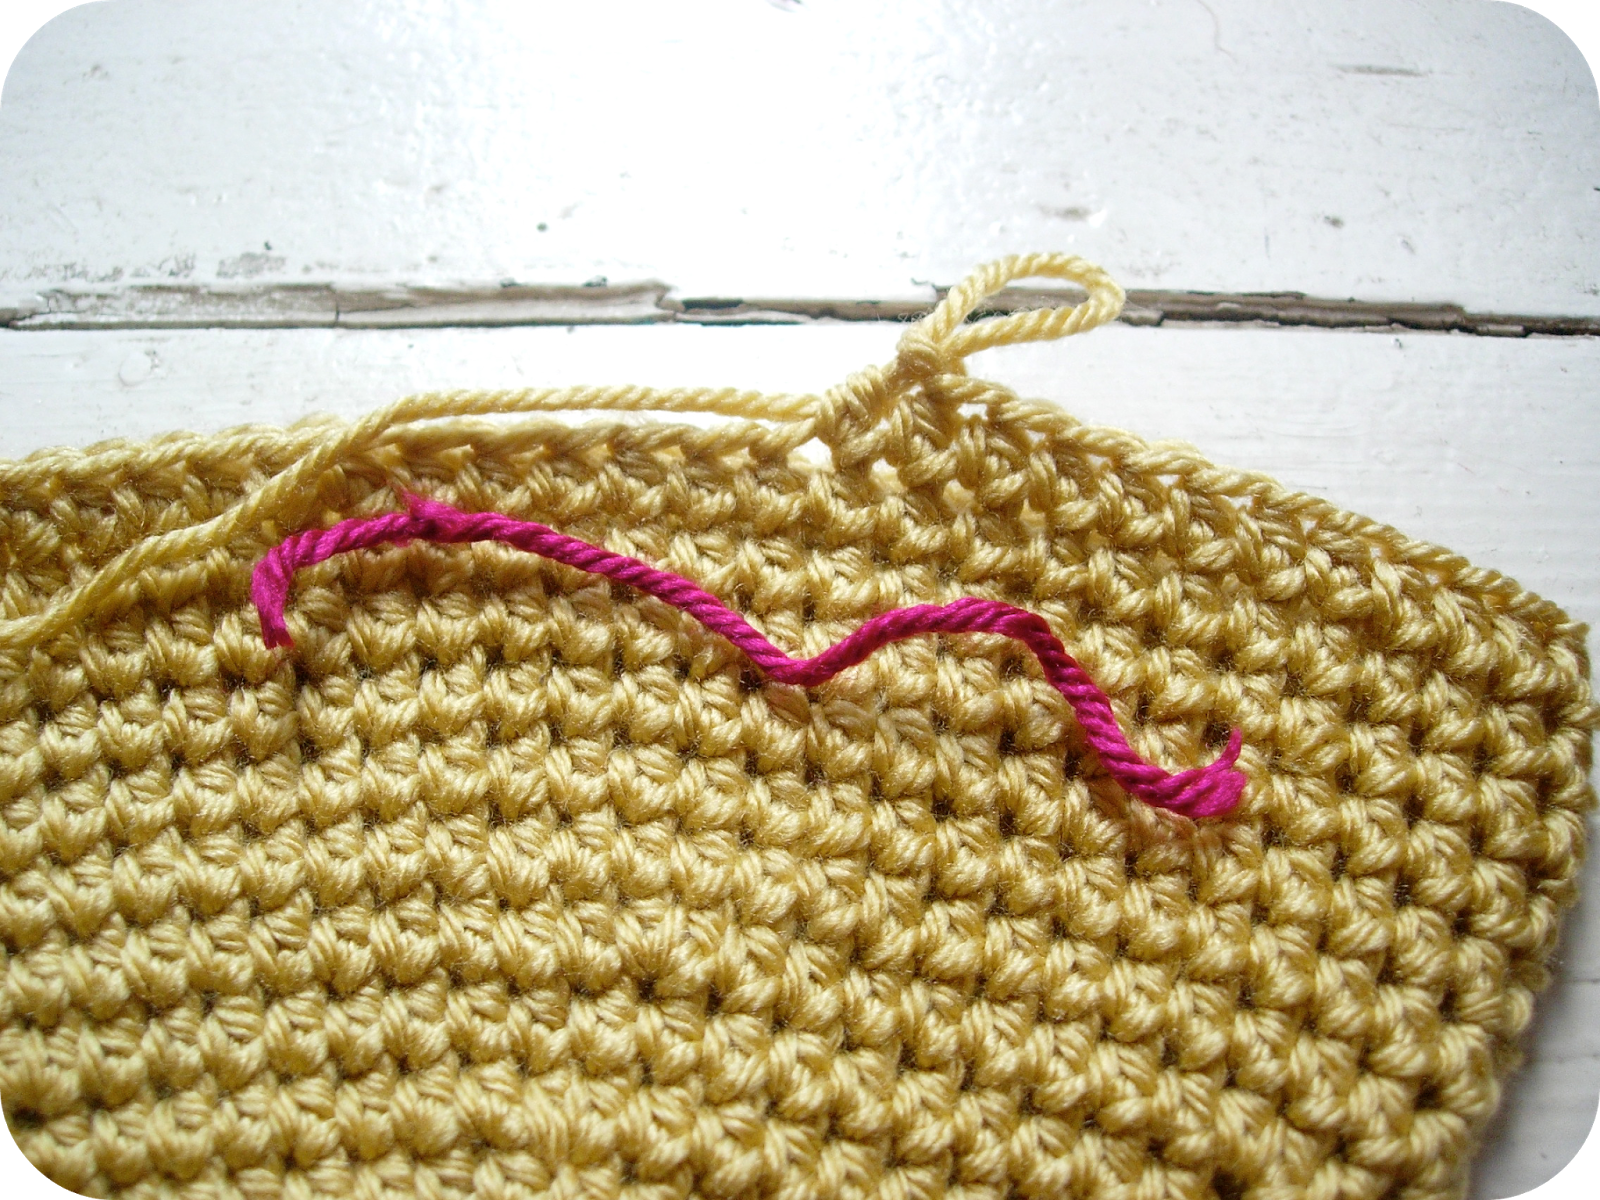
Once you've got your scrap of yarn and you arrive at the point in your work you need to mark, simply lay your marker over the work, right up next to the stitch you've just worked.


Then just go ahead and work your next stitch, catching the yarn in between the two stitches and continue working on to the end of the round.

As you approach your marker, lift either end of the marker up and over your work, place next to the last stitch worked and work your next stitch. You can now remove the marker from the round below, but I actually prefer to keep it in place, so I can see the progression I've made and keep a check on whether I'm being nice and even with my rounds.

The above assumes that you are working in continuous rounds, not turning or joining, but you can use the same method for any way you're working, including working in straight rows.
A lot of my crochet patterns, including my newest sock pattern, are worked in the round, but even those that aren't often require you to pop a marker in at some point during the piece. I always try and write the pattern as though you were using a removable stitch marker, because I know that's what a lot of people do, but you know something, I very very rarely do. I much prefer a little bit of scrap yarn! I think it works so much better, because a lot of the time, it's the space between the stitches I really need to mark, not the stitch itself and because for me, I learned a lot of my fibre techniques from knitting and that's the way you generally place a marker in knitting. I also think it's a much more accurate way of keeping place and doesn't require reattaching every round, so I thought I'd share with you how I do it.
First choose your scrap of yarn carefully, this may sound a little silly, but you don't want something that will leave strands of fibre in your work and you certainly don't really want to use wool, which may felt into your work. To be safe use some cotton or acrylic yarn, in a nice contrasting colour to your work, so that it's visible, but not something that may leak dye on your work, especially if you're working in lighter colours. I tend to use acrylic and I carry a little selection of ends around with me in my notions bag. You only really need about 2-3 inches of yarn.
Once you've got your scrap of yarn and you arrive at the point in your work you need to mark, simply lay your marker over the work, right up next to the stitch you've just worked.


Then just go ahead and work your next stitch, catching the yarn in between the two stitches and continue working on to the end of the round.

As you approach your marker, lift either end of the marker up and over your work, place next to the last stitch worked and work your next stitch. You can now remove the marker from the round below, but I actually prefer to keep it in place, so I can see the progression I've made and keep a check on whether I'm being nice and even with my rounds.

The above assumes that you are working in continuous rounds, not turning or joining, but you can use the same method for any way you're working, including working in straight rows.