

Dragon Finger Puppets :: A Tutorial ::
Posted by vicki brown on
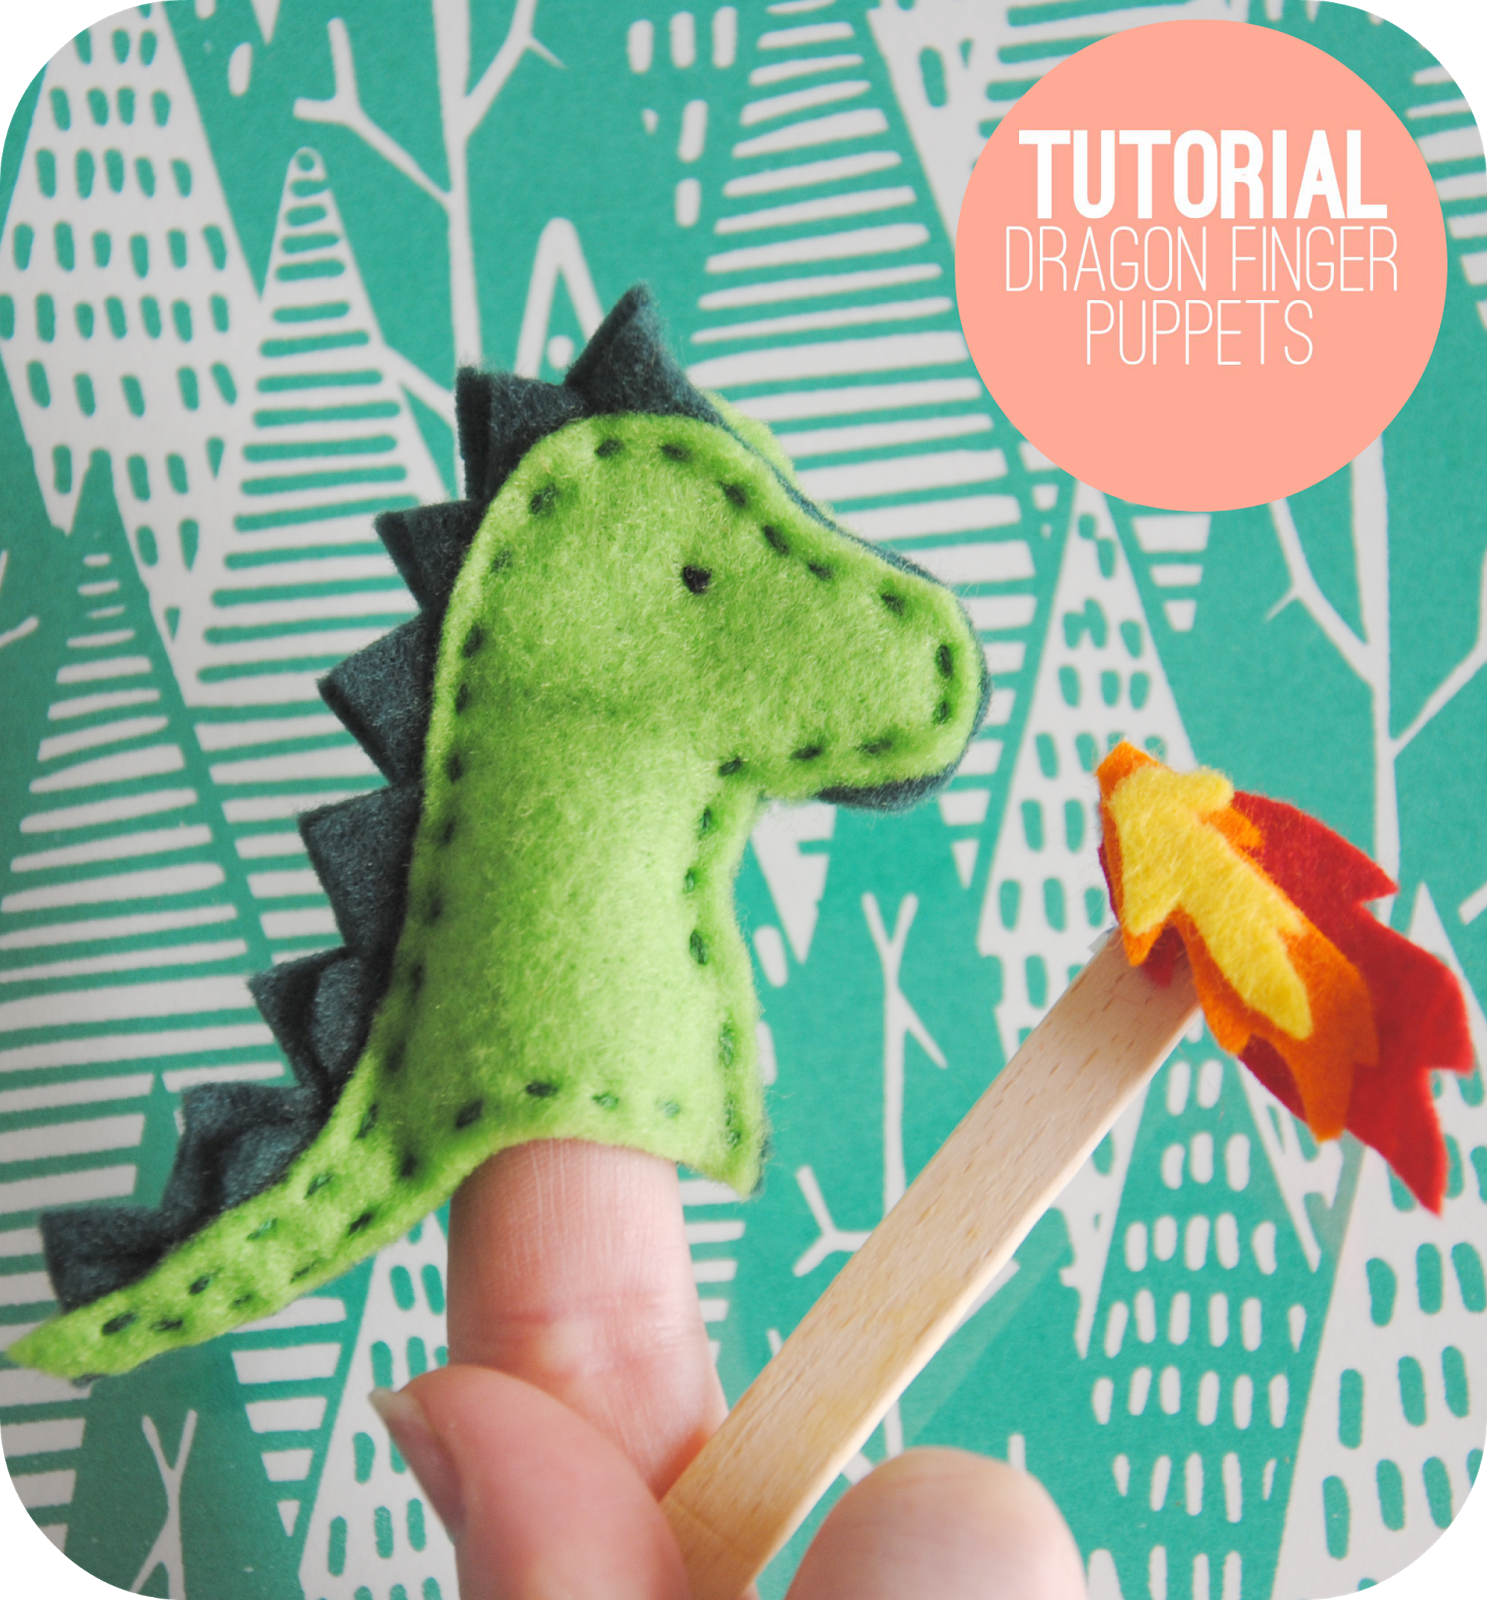
A couple of weeks ago Milo shared a Knights and Princesses themed party with his best friend. As the big day approached, Ang (best friend's mum) and I took to pinterest (of course) for inspiration. One of things I volunteered to organise were the party bags. We sourced some fabulous knightly themed little pieces (courtesy of pinterest) and added the usual sweets etc... But I decided, on a bit of whim (something that seems to be happening more and more recently, I'm blaming the pregnancy hormones!) that I would make some dragon finger puppets to include. So in short, I decided 1 week before the party that I would make, by hand, 30 dragon finger puppets. As it was I managed to get them finished in plenty of time without any late nights or anything.

As they turned out to be a fairly simple affair, I thought I'd share with you how I made them, in case you to find yourself wanting to make a whole children's party's worth of dragon themed favours, just fancy making a couple for your own children or as a gift for a particular knightly or dragon obsessed child. I also think they double quite well as dinosaurs if that's more your thing.

You'll need ::
- 2 colours of felt. I used all manner of colours for mine, just bits and pieces that I had in my stash. But green is obviously a good choice as is red.
- Embroidery thread that matches the felt you're going to use for the outside of your dragon.
- Black embroidery thread.
- Small scissors.
- Sewing pin.
- Embroidery needle.
- Dragon Template (you can download my template here)
First off, cut out your dragon templates.
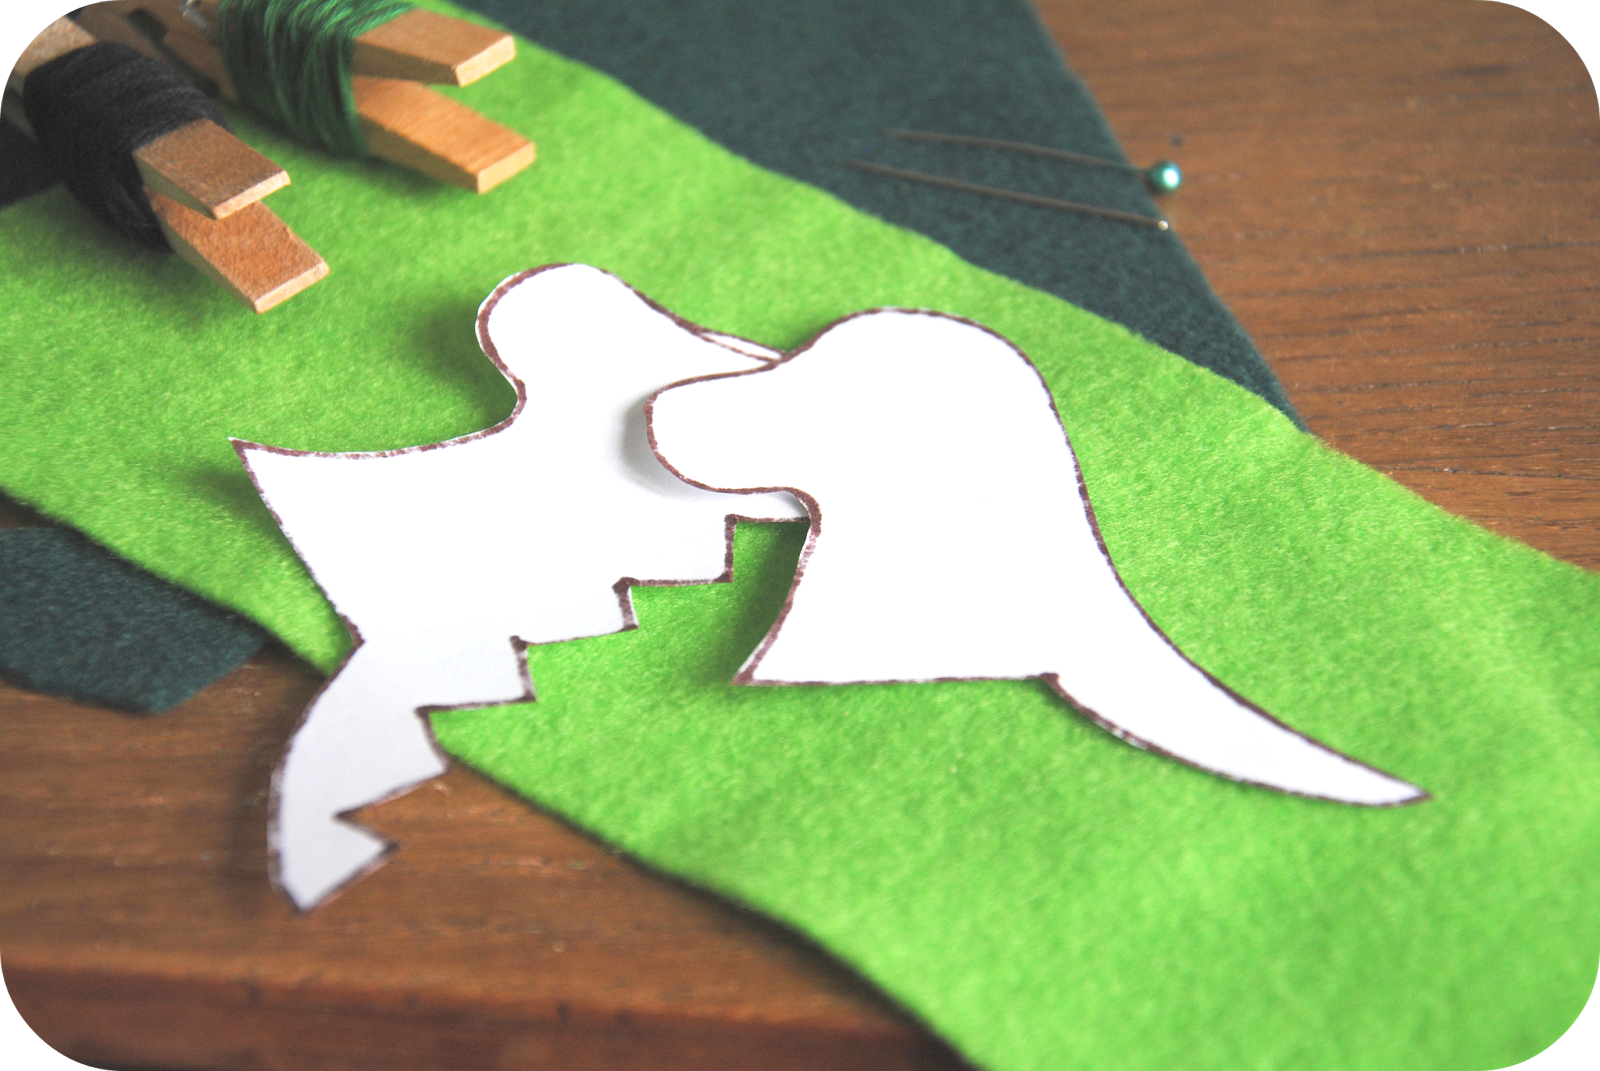
Fold your felt for the outside of the dragon in half and pin your template without the spikes through both thicknesses.

Carefully cut around the template, so that you have 2 identical pieces of felt.

Do the same with your other colour of felt and the dragon template with the spikes.

You should now have 4 pieces of dragon shaped felt, 2 without spikes in one colour and 2 with spikes in your other colour.
Sandwich the spiked dragon pieces between the non spiked pieces and pin them together.
Using your coloured embroidery thread and embroidery needle, carefully sew all 4 pieces of felt together, starting at the front bottom of the dragon.
Using your coloured embroidery thread and embroidery needle, carefully sew all 4 pieces of felt together, starting at the front bottom of the dragon.

Work down the tail and back up again, once you get to the end of tail, sew only through 2 thicknesses of felt as you work around the finger hole, leaving a space for said hole.
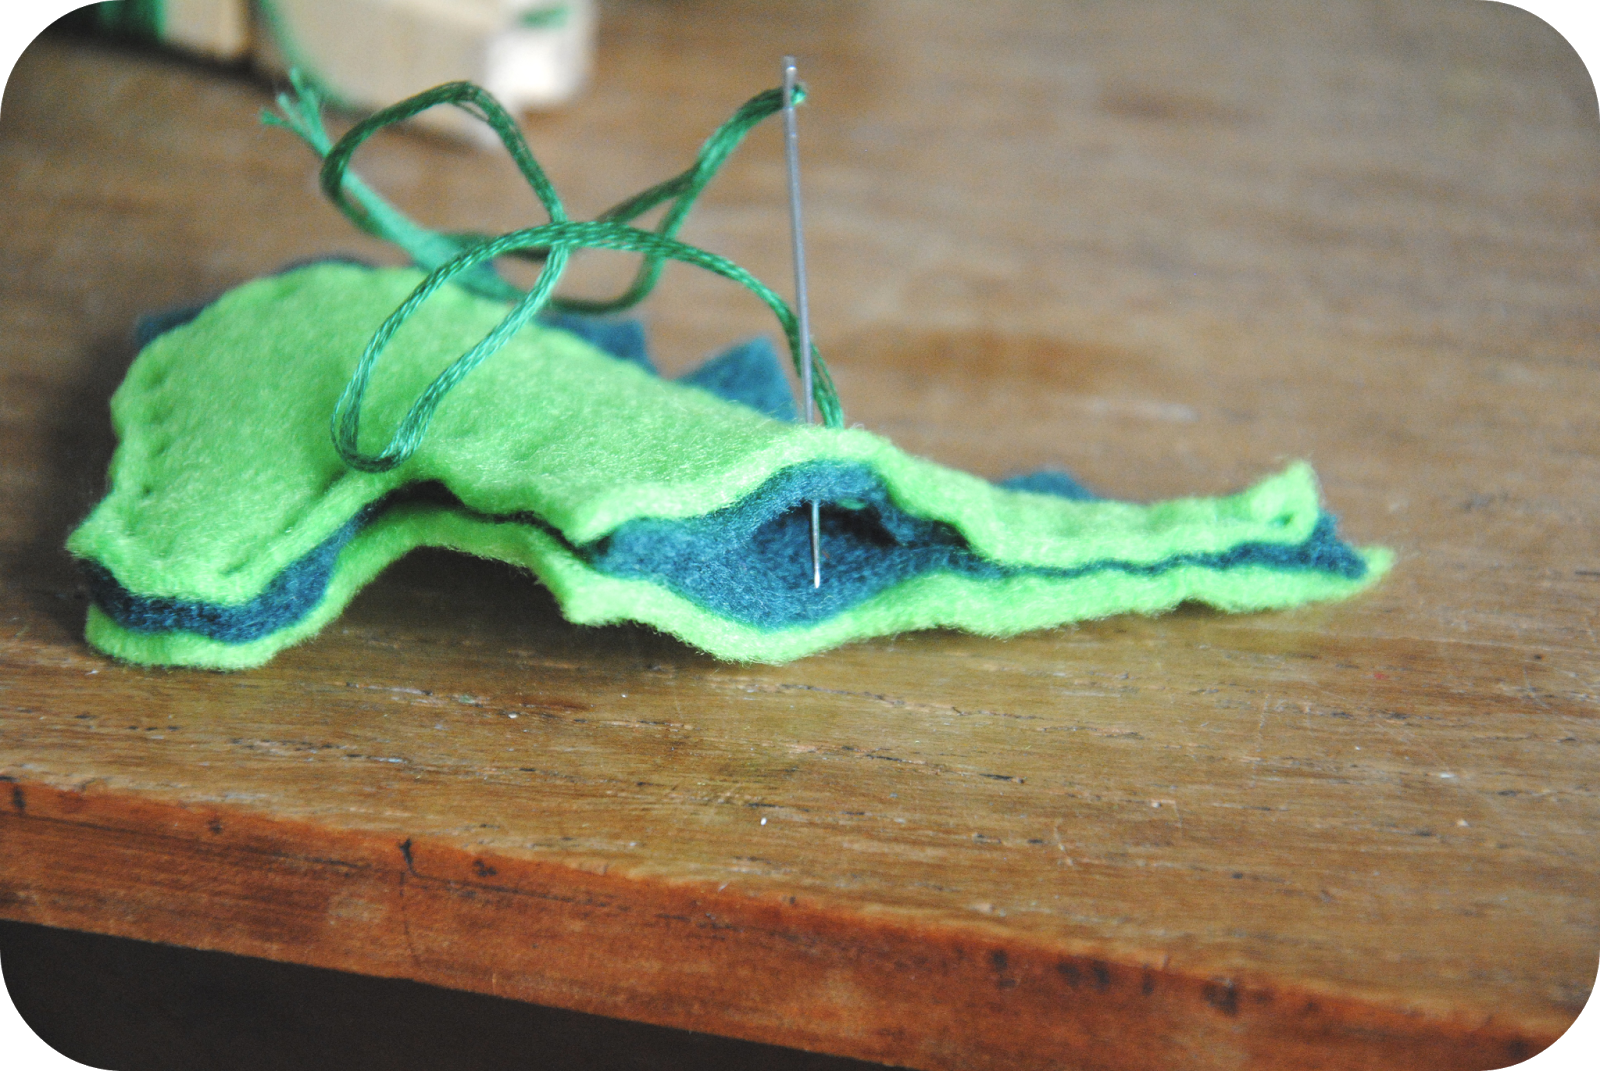
Work all the way around back to the tail. I passed my needle back and forth through the stitches on the tail a few times, being careful to keep these stitches invisible so as to fasten the thread in place, then snipped it as close to the felt as possible.

With the black embroidery thread and embroidery needle sew an eye in place on both sides.

To do this I put a knot in the end of the thread and inserted it inside the puppet, bringing the needle out at the point I wanted the eye. As the puppet doesn't need to open all the way up to the eye, I just sewed directly through all 4 pieces of felt sewing little crosses on both sides of the face. As with the coloured thread, I worked it back and forth through the stitches on the face to fasten the thread and snipped as close to the felt as possible.
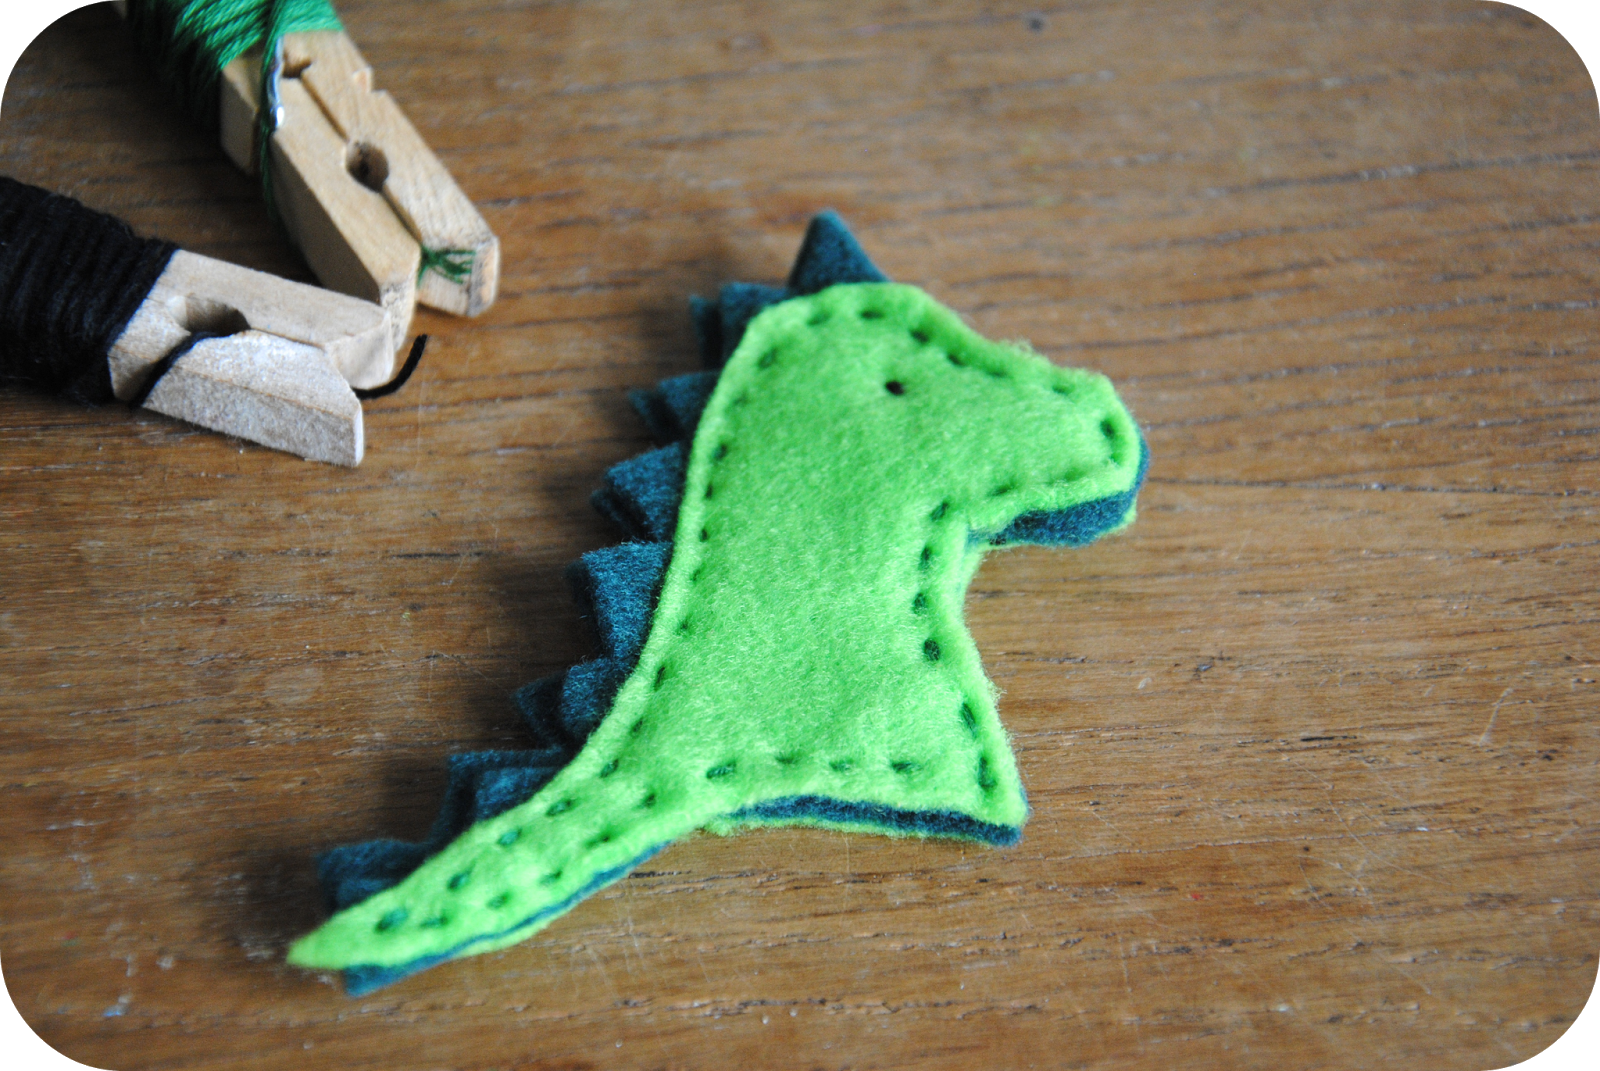
And you're done! If you have little bits of overlap on either of the colours of felt you can carefully trim them so that they flush against each other.
If you do have a go at making any of your own I'd love to see them :)