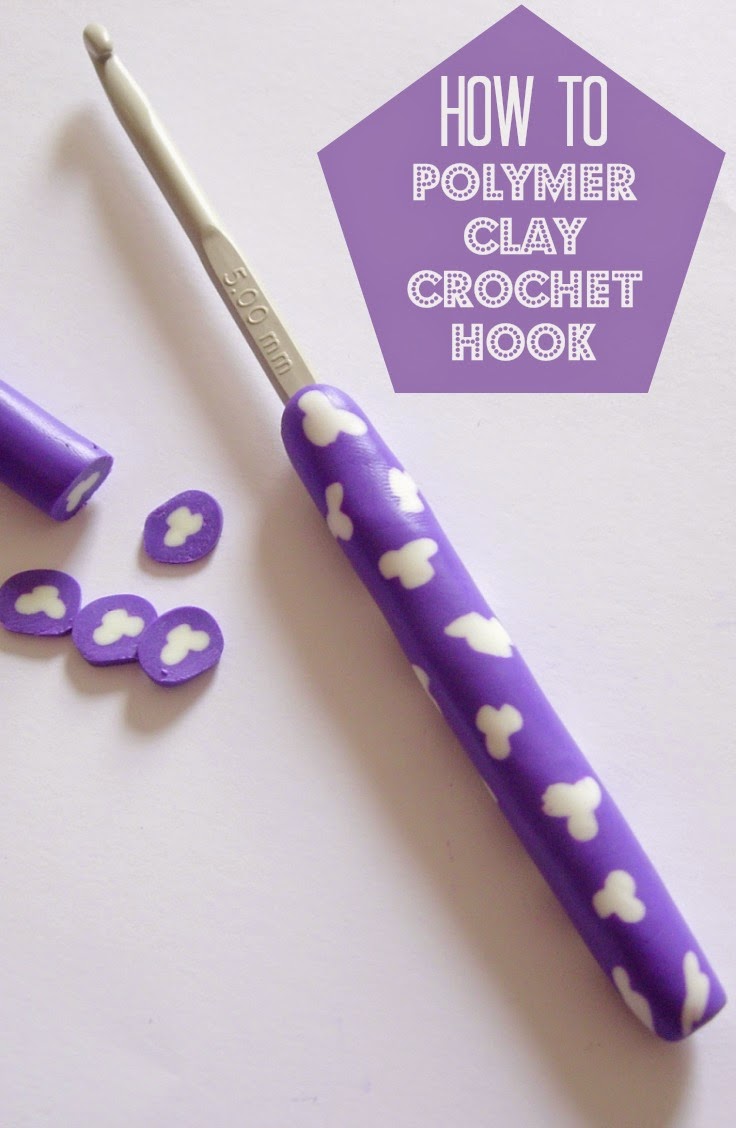
Polymer Clay, Crochet Hook Handles :: A Tutorial ::
Posted by vicki brown on
Last Christmas, I decided to make up some polymer clay covered crochet hooks as gifts for my nieces, to accompany the Magic Yarn Balls I also made up for them. It's a fairly simple and fun project I'd thought I'd share with you today.
For a long time I only ever used the small metal handled crochet hooks you see in these pictures here. I never had any problems with using these and though I would occasionally treat myself to a bamboo hook, I was very happy using these for a long time. Then I started to crochet professionally and a lot, this was when I started to realise the advantages of having a bit more handle to hold on to. I wrapped hairbands around the handles for a while, then I figured I have a lot of polymer clay in my possession, why not have a go at making some more permanent, more attractive handles.
These ones are even glow in the dark!
I'm offering someone the chance to win their own set of supplies to make up some crochet hook handles of their own over here.
However anyone can make these with just a few crafty supplies, so if you would like to have a go keep reading.
You'll need ::
- Metal Crochet Hooks (in whatever size you desire-I only recommend using the metal hooks, as they need to be baked in the oven)
- 2 Colours of Polymer Clay (you'll need a quarter of a 56g block of Fimo, or the equivalent, in both colours-I used purple and glow in the dark for my example)
- Craft Knife
- Small Shaped Cutters, around 2cm wide (remember, once these have been used for polymer clay they cannot be used for food)
As I said above, you'll need a quarter of a 56g block of fimo, fortunately the blocks are nicely separated into strips to make this easier to measure. Ensuring you have nice clean hands, condition your clay and roll each colour into a ball. I keep a packet of baby wipes handy when I'm working with clay so as to make it easier to switch between colours without having to keep washing my hands every time.
Squash your balls down slightly, so that your chosen shaped cutter fits nicely in the centre, leaving around .75cm of clay around the edge of the shape. Once in position cut out the shape and remove it from the circle. Do this with the same cutter on both colours.

With your darker colour (or the colour you would like to be the main colour on your hook) take the circle and pop the cut out of the other colour inside.
Now leave this to one side for the moment, it's good to give it a chance to settle for a bit.
The shape you cut out of the darker colour should be just enough clay for the next step. Roll it out so that it's the length of your hook, up to the point where the thumb rest is, you want to leave this part of the hook uncovered.
Wrap the clay around the hook up to this point and around the bottom of the hook, using your hands to mould it all the way around evenly. You may need to manipulate it a bit and roll it around in your hands to make it nice and even. Remembering you do not want this part of the clay to be too thick as you still have more clay to add on top of this, you only just want it covered.
Move back to your cane. Start to squish it between your thumb and forefinger in order to elongate it. The aim is to roll this out to about 1cm thick, but you'll need to do this fairly gradually in order to maintain the shape inside.
Once you've managed to get it a bit thinner, you can start rolling it out into a sausage shape between your hands. Keep going until it's about 1cm thick.

The ends will probably be a bit mashed up, but don't worry, using your craft knife slice into the middle and you'll see your original shape will have remained intact, just much smaller.

Use your craft knife to cut tiny rounds from your cane, around 2mm thick, you'll need enough to cover your hook.

Start building your slices of cane around your hook, working onto the clay already laid down as the foundations. Don't worry if you leave a few gaps, you'll have to because of the shape of the rounds anyway and don't worry about them looking uneven at the moment, just keep adding them all the way round from top to bottom.
Once your hook is covered, use your hands to gently roll the hook, squidging all the clay so it sits evenly around without any seams.

When you're finished your hook should look as below.


Follow the instructions on your packet of clay as to how to bake. Once baked, if you've left a few fingerprints you can use some fine sandpaper to give it a more even polished look.
Grab some yarn and crochet!
Don't forget for your chance to win a set of supplies to make your own hooks, hop on over here.

.jpg)


